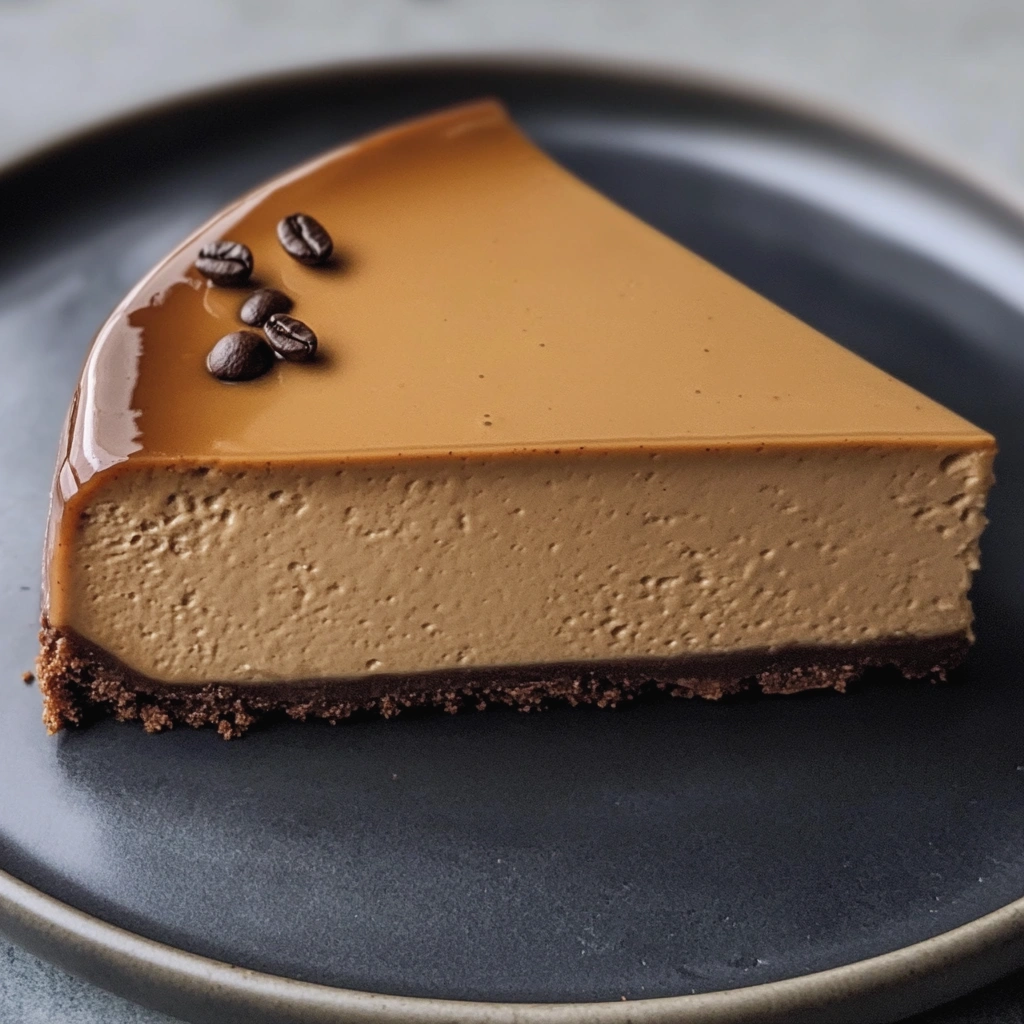
Rich & Creamy Coffee Cheesecake – A Dream Dessert for Coffee Lovers
Do you find yourself daydreaming about creamy desserts infused with rich coffee flavors? If you do, then meet your new favorite indulgence: Rich & Creamy Coffee Cheesecake! This decadent dessert beautifully balances the lusciousness of classic cheesecake with the bold, comforting taste of coffee, making it a perfect fit for any coffee lover.
While many people think of cheesecake as a complicated dessert to make at home, this recipe will guide you through each step to create a show-stopping cheesecake that’s simple yet impressive. Before you know it, you’ll be whipping up your favorite café dessert right in your own kitchen. Ready to excite your taste buds? Let’s dive into this dreamy dessert!
Table of Contents
Ingredients List
To create this delightful Coffee Cheesecake, gather the following ingredients:
For the Crust
- 1 ½ cups graham cracker crumbs
- 1/4 cup unsweetened cocoa powder
- 1/4 cup sugar (or sweetener of choice)
- 1/2 cup unsalted butter, melted
For the Cheesecake Filling
- 24 oz cream cheese, softened (three 8-ounce packages)
- 1 cup granulated sugar (or sweetener of choice)
- 3 large eggs
- 1 tablespoon vanilla extract
- 1/2 cup brewed coffee, cooled (strongly brewed)
- 2 teaspoons instant coffee granules (optional for a stronger coffee flavor)
- 1 cup sour cream (or Greek yogurt for a lighter option)
For the Topping
- 1 cup heavy whipping cream
- 1/4 cup powdered sugar
- 1 teaspoon vanilla extract
- Chocolate shavings or cocoa powder for garnish (optional)
Substitutions
- Gluten-free options: Use gluten-free graham crackers for the crust.
- Dairy-free: Use vegan cream cheese and coconut oil in place of butter for the crust.
- Low carb: Substitute the sugar for a low-carb sweetener like erythritol.
Timing
- Prep Time: 20 minutes
- Cook Time: 60 minutes
- Cooling Time: 4 hours (or overnight)
- Total Time: 5 hours and 20 minutes
Imagine indulging in a luscious slice of coffee cheesecake in just a few hours, with the dreamy aroma of coffee and vanilla wafting through your kitchen!
Step-by-Step Instructions
Step 1: Prepare the Crust
- Preheat your oven to 325°F (163°C).
- In a bowl, combine graham cracker crumbs, cocoa powder, sugar, and melted butter. Mix until well combined.
- Press the mixture firmly into the bottom and slightly up the sides of a 9-inch springform pan.
- Bake in the preheated oven for 8-10 minutes, then remove and let it cool while you prepare the filling.
Step 2: Make the Cheesecake Filling
- In a large bowl, beat the softened cream cheese with an electric mixer on medium speed until smooth and creamy.
- Gradually add the granulated sugar, mixing until well combined.
- Add the eggs, one at a time, mixing on low speed after each addition until combined. Be careful not to overmix!
- Mix in vanilla extract, cooled coffee, and instant coffee granules (if using) until smooth.
- Finally, add the sour cream and mix until well blended.
Step 3: Bake the Cheesecake
- Pour the cheesecake batter into the prepared crust, smoothing the top as needed.
- Bake for 60 minutes, or until the edges are set but the center remains slightly jiggly.
- Turn off the oven and crack the door open, allowing the cheesecake to cool in the oven for 1 hour. This helps prevent cracking.
- Once cooled, remove from the oven and refrigerate for at least 4 hours, or overnight for best results.
Step 4: Prepare the Topping
- In a clean bowl, whip the heavy cream until soft peaks form.
- Gradually add the powdered sugar and vanilla extract, continuing to whip until stiff peaks form.
- Spread or pipe the whipped cream over the chilled cheesecake. Optionally, dust with cocoa powder or garnish with chocolate shavings.
Step 5: Serve and Enjoy!
- Carefully remove the sides of the springform pan.
- Slice the cheesecake and serve to impress your guests with each velvety, coffee-infused bite!

Nutritional Information
Here’s a breakdown of the nutritional content per slice (based on 12 servings):
- Calories: 350
- Protein: 6g
- Fat: 28g
- Carbohydrates: 24g
- Sugar: 14g
Values are approximate and may vary based on specific brands and ingredients used.
Healthier Alternatives
To make your coffee cheesecake a bit healthier without sacrificing taste:
- Reduce sugar by using half the amount; the coffee flavor remains strong enough to carry the cheesecake.
- Swap out some of the cream cheese for mascarpone or fat-free cream cheese for lower fat content.
- Use a nut crust made from ground almonds or walnuts to boost healthy fats and reduce carbs if desired.
Serving Suggestions
This coffee cheesecake is simply delightful on its own, but consider pairing it with:
- Fresh berries for a pop of color and tartness.
- A cup of coffee or espresso to complement the flavors.
- Chocolate-covered espresso beans for added texture and a flavor punch.
Common Mistakes to Avoid
- Overbaking: Keep an eye on your cheesecake to avoid drying it out. It should be slightly jiggly in the center when done.
- Skipping the cooling step: Allow the cheesecake to cool in the oven to prevent cracks from forming.
- Using cold ingredients: Ensure your cream cheese and eggs are at room temperature for a smooth batter and even baking.
Storing Tips
Keep your Coffee Cheesecake fresh and delicious with these tips:
- Refrigeration: Store leftovers in an airtight container in the fridge for up to 5 days.
- Freezing: You can freeze the cheesecake for up to 2 months. Ensure it’s well wrapped to avoid freezer burn. Thaw overnight in the fridge before serving.
Conclusion
Experience the indulgence of Rich & Creamy Coffee Cheesecake, which is sure to be a hit with coffee enthusiasts! Its rich flavors and velvety texture make it the perfect dessert to serve at any gathering or simply to enjoy as a special treat.
Have you tried making this dessert? We’d love to hear your feedback! Share your experience in the comments, tag us in your coffee cheesecake creations on social media, and don’t forget to subscribe to our newsletter for more delicious recipes!
FAQs
1. Can I make this cheesecake ahead of time?
Absolutely! This cheesecake is perfect for making a day or two in advance, allowing the flavors to meld beautifully in the fridge.
2. Can I use decaf coffee?
Yes! Decaffeinated coffee works just as well and will maintain the flavor without the caffeine kick.
3. How do I prevent cracks in my cheesecake?
Baking at a low temperature and using the water bath method can help prevent cracks in your cheesecake.
4. Is there a way to make this cheesecake lighter?
Certainly! Use lower-fat cream cheese or Greek yogurt as a partial substitute for a lighter version.
5. Can I use flavored coffee for this recipe?
Definitely! Using flavored coffee, such as hazelnut or mocha, will add a unique twist to your cheesecake.
Indulge in the delightful richness of this Coffee Cheesecake, and savor the perfect union of creamy texture and coffee flavor in every slice! Happy baking!